Forum Migration Notice
We're transitioning to a more modern community platform by beginning of next year. Learn about the upcoming changes and what to expect.
6.06 new paint visualizer | smart component
c63amg
✭
in RobotStudio
Hello,
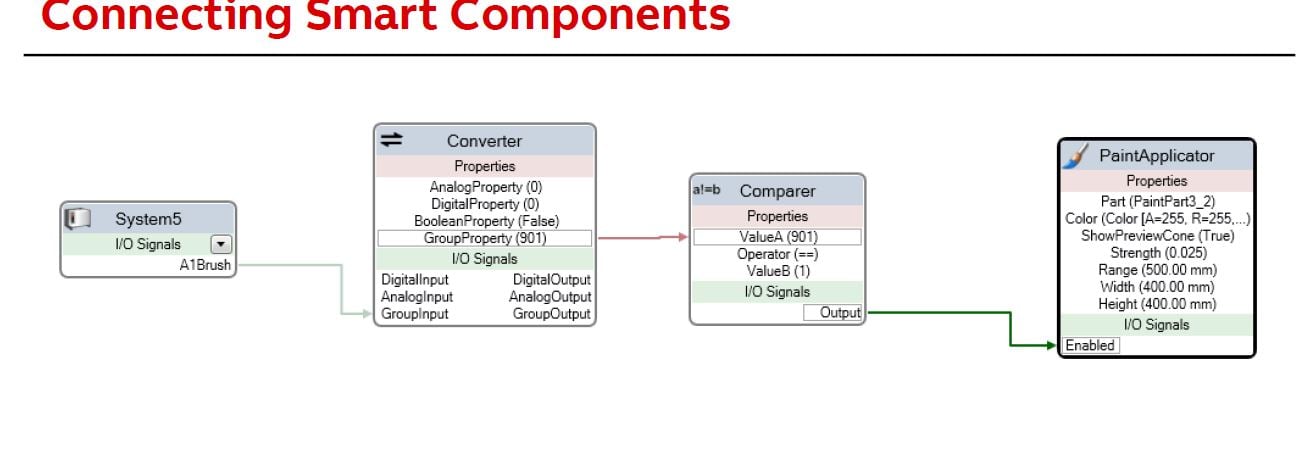
Is there more information somewhere about setting up the smart components for the new spray visualization?

Is there more information somewhere about setting up the smart components for the new spray visualization?

0
Comments
-
Yes a tutorial would be good on this.
0 -
Got it.
- Create your smart component.
- Add the three components
- create an i/o signal for that smart component. this will receive the signal from the controller
- add connections between components (I used the design tab)
- Then the key is to go into simulation tab > station logic > design tab > select the drop down from your controller > select A1brush > then make a connection between that unit, and your new spray simulator

0 -

0 -
the next thing I am trying to figure out is how to simulate with multiple parts.
The PaintApplicator component will only accept 1 part.
0 -
I guess you could either
1) Use one Applicator component for each part,
2) Update the Part property as the robot moves to a new part, or
3) Merge the parts into a single part.
Johannes Weiman
Software Engineer
RobotStudio Team, ABB Robotics0 -
JWeiman said:I guess you could either
1) Use one Applicator component for each part,
2) Update the Part property as the robot moves to a new part, or
3) Merge the parts into a single part.
I tried 1, it produced some funky results.I think 2 would be the best route in my case, but I haven't figured it out yet.
3 is difficult in my situation unfortunately.
0 -
0
-
Bonjour à vous
merci pour tes explications C63amg vraiment bien ton post,par contre j ai bien fait toutes les étapes que tu décris mais quand je lance ma simulation ça ne peint pas les pièces , pourrais tu m aider??
Neily03 j ai vu ta vidéo sur YouTube tube j aimerais vraiment arrivé à ce résultat c vraiment bien ...
j espère que vous pourrais m aider.
d avance merci,
0 -
c63amg said:JWeiman said:I guess you could either
1) Use one Applicator component for each part,
2) Update the Part property as the robot moves to a new part, or
3) Merge the parts into a single part.
I tried 1, it produced some funky results.I think 2 would be the best route in my case, but I haven't figured it out yet.
3 is difficult in my situation unfortunately.
There is a bug with using multiple applicators that will be addressed in 6.07. (They would unintentionally share the same texture.)
Johannes
Johannes Weiman
Software Engineer
RobotStudio Team, ABB Robotics0
Categories
- All Categories
- 5.7K RobotStudio
- 401 UpFeed
- 21 Tutorials
- 16 RobotApps
- 306 PowerPacs
- 407 RobotStudio S4
- 1.8K Developer Tools
- 251 ScreenMaker
- 2.9K Robot Controller
- 366 IRC5
- 90 OmniCore
- 8 RCS (Realistic Controller Simulation)
- 857 RAPID Programming
- 43 AppStudio
- 4 RobotStudio AR Viewer
- 19 Wizard Easy Programming
- 111 Collaborative Robots
- 5 Job listings
